Thursday, February 28
How to Mix Instrument Frequencies for Best Sound
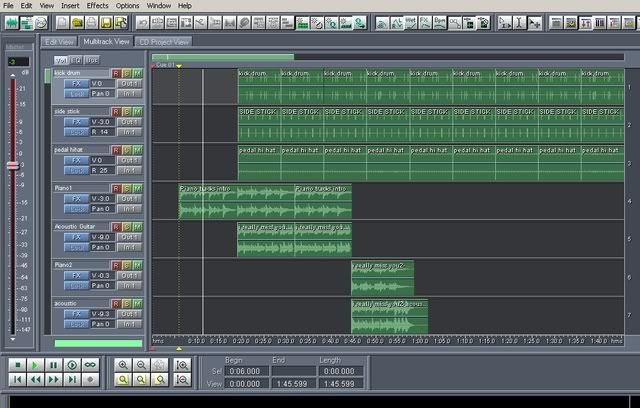
Supposing you have completed the recording and panning process. It is the proper time to start mixing the frequencies of the instruments. A song which is not mixed properly can result to poor quality sound recording.
I did myself some educational recording and mixing of my own song "At the highway" (credits: written and produced by Emerson Maningo), initially published on "How to write the hook of the song" at www.make-your-own-song.com.I played and recorded all the instruments (guitar, bass and drums) in multi-track and the vocals are performed by Jeanine Maningo (author: How to become a singer at becomeasinger.blogspot.com). There is no bass guitar involved. Listen to the sound clip below which the frequencies are still not mixed for clarity. (although panning and recording process are done)
This mix does not include the bass guitar mixing as it is being discussed in: tips in mixing bass guitar like a pro. Check this post!
A quick critic to this mix are as follows:
1. Guitars dominating the mix.
2. Muddy guitar sound
3. Kick sounds so weak looks like punching a pail.
5. Vocal lower frequency range in conflict with lower guitar frequencies and kick.
Though this is a demonstration of music production at its simplest form, it has been illustrated, that muddiness of the mix can be corrected at the early part of mixing process and should not be a part of mastering process.
Below is the corrected mix with proper mixing settings applied:
What can you say? Clear is it? Yes I admit it is. The kick and the rest of the instruments are not fighting with each other, so guitar sound is so clear and not conflicting with either the vocals. Overall, the sound is not muddy. The secret in doing this, is very expensive in recording schools. But I will reveal below:
Rule #1. Each music instruments has it's own center frequencies and range. Use a parametric equalizer to adjust.
and
Rule #2. Cut and boost conservatively depending on the resulting sound.Q setting of a parametric equalizer is important.
Here we introduce "Q" and parametric equalizer, what are those things?, Q is a measurement of how narrow or wide the frequency adjustment on a parametric equalizer.Parametric equalizer is a mixing tool that will enable you to manipulate frequencies of instruments and balance it in the mix, just like what a paint brush will do to a painter.
To simply understand Q:
a.) a Q of 1.0 could be considered as medium wide.
b.) a Q of less than 1.0 is considered to be wide frequency adjustment.
c.) a Q of 1.4 is average adjustment.
d.) a Q of greater than 2.0 is a narrow adjustment.
Also there is what we call as "shelving". It can be classified as low pass filter or high pass filter. A low pass filter will preserve low frequencies and cut frequencies higher than the cut off.A high pass filter will preserve higher frequencies but cut frequencies lower the cutoff frequency.
A center frequency is a frequency where a maximum amplitude occurs. In layman term, it is a frequency most noticeable by the ear of that instrument. Let say voice frequencies. It is around 300Hz to 3000Hz. It is a pretty wide range, but that is the bandwidth of a telephone line. It is why the telephone lines are optimized for voice transmission.
The center frequencies of that bandwidth is around 1650Hz~2000Hz. It is where the voice frequency is strongest. And during a mixing process, that certain spot in frequency range is reserved for the voice to avoid conflict with other instruments.
Also take note the amplitude adjustment in parametric equalizer are measured in dB (decibels).
Below are the list of common instruments I used to mix "At the highway" and the EQ adjustment:
Short Snare
Freq1: 100Hz, Boost 1dB, Q 1.0
Freq2: 2500Hz, Cut 3dB, Q 1.4
Freq3: 8000Hz, Boost 2dB, Q 1.0
Purpose- 100 Hz serves to fatten the snare sound, cutting at 2500 Hz will minimize conflict with vocal frequencies. Boosting at 8000Hz will add some crisp (audible snare strings)
Kick
Freq1: 75Hz,Boost 6dB,Q 1.0
Freq3: 400Hz, Cut 6dB, Q 1.0
Freq4: 4000Hz, Boost 1dB, Q 0.6
Purpose- Boosting at 75Hz creates super-punch for the kick., Cutting at 400Hz can prevent conflict guitar lower bass and improves kick sound by removing the cardboard like sound. Boosting at 4000Hz can make the kick sound to be heard on small speakers such as headphones.
Guitar
Freq1: 160Hz, high pass filter, Cut 6dB
Freq2: 3000Hz, Cut 9dB, Q 1.0 (Cutting this prevent direct mud sound with vocals which occupies the same frequency range)
NOTICE: TO LEAVE A COMMENT, PLEASE VISIT THE NEW URL OF THIS PAGE: http://www.audiorecording.me/how-to-mix-instrument-frequencies-for-best-sound.html
Wednesday, February 27
Tips on buying a mixer for home recording
But successfully I still managed to do it right, listen to one sample song below:
"Always thinking of you" by Jeanine Maningo
The problem that I am always facing is the difficulty of the recording process. To change instruments, I have to go at the back of the computer and unplug my cable. It is just to risky sometimes I get electrocuted.
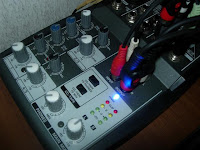
For year 2008, I have a new year resolution to buy a simple mixer at home. I surf the net and i found Behringer xenyx 502. I say it is the best mixer for home at the lowest budget while achieving the best quality of sound recording.
I am so contented of my purchase, that I made this tips:
1. Buy the smallest mixer as you can depending on your budget but check the brand. Always go for branded ones, those that already made some reputation in sound engineering industry. When we go to local store we see a lot of mixer, cheap ones but not branded. The sound quality is awful. Just be careful you would not buy a pirated/imitation one.
2. Buy in the city's best recording shop for gears. I buy my behringer xenyx 502 in the city's biggest mall and also sells some branded speakers/monitors like Bose and other stuff.
3. Quality is more important the price itself but not too much. I mean if you can afford and you get the quality you want, then go for it. Just do not exceed on buying the most expensive ones but the quality level is just the same.
4. Check for the number of inputs, Xenyx 502 got 5 inputs (mono), and it is enough for me. The higher the number of inputs the better, but buy only something you need. If you buy many inputs but you use only one most your time. It is wasted.
5. Check for warranty.Make sure your product is protected by warranty in case of early damage.
6. Check for wide applicability. This means, at the same I can use my mixer to:
a. Record sound
b. Record sound while I can monitor (by headphone maybe)
c. Can shift to headphone or to the loud monitor (there is a switch)
d. Has clip detector
e. Has trim function ( gain, very important in recording if you are not using a direct box)
f. Stereo output
7. This means, you should fully understand the manual first before buying anything., to measure it's applicability.
On my next post, I will concentrate on digital audio recording process. Cheers.
NOTICE: TO LEAVE A COMMENT, PLEASE VISIT THE NEW URL OF THIS PAGE: http://www.audiorecording.me/tips-on-buying-a-mixer-for-home-recording.html
Thursday, February 14
13 Important Factors in Computer Audio Recording

1. The quality of your soundcard- before , I attempted to use an onboard soundcard from ASUS-P4P800X. It is a Soundmax Soundcard. Well, I can say it is decent for an onboard soundcard but the quality is hard to accept. Although it helps me produce 7 songs from my catalog, but it takes me a very hard time to record because of these following weaknesses:

3. The speed and size of the hard disk - In the audio recording process, the sound going out from the guitar/any instruments are analog in nature, hard disk cannot store analog data, so the function of the soundcard is to convert analog to digital signals, digital signals are then stored in the hard disk. For a quality recording, I record at 16 bit/44.1 KHz, although others will record at a much higher sampling rate. The type of sound file is WAV which is a very heavy file and consumes a lot of disk space. The sampling rate is also very important to consider when selecting the size of your hard disk. Based on my experience, I have 160 GB of harddisk and when I record at 16 bit/44.1 KHz, it is a very efficient because file sizes are still not big compared to the size of the disk. But the quality are still good. If you have bigger disk, you can record at much higher resolution like 24 bit/ 96 KHz, and this will give a bigger WAV file. The speed of the harddisk is important because during recording and the sound card performs the audio to digital conversion, the disk will store the data by rotating measured in revolutions per minute (RPM). So a slow rotating disk can have problems with recording, and it is recommended to select a faster hard disk such as 7200 RPM range. I used Samsung SP0822N and Seagate ST380011A, all are have rotating speed of 7200 RPM.
The quickest way to check when PIO mode is activated is to hear clicks, distortion when audio is being played back. Despite of having a high processor, there were be distorted clicks on the audio. This is a sign that PIO is activated. PIO is not recommended for recording because it will give recording problems such as latency and distortion.
5. Size of your RAM - RAM is called Random-Access-Memory, one of the most important components in a computer system. It's main role in computer audio recording is like a refrigerator. Without refrigerators in a home, everytime we would like to buy something like food. We have to go to the supermarket and get what we want. It's a long time to go to the supermarket then come back to our home. Instead, having a refrigerator saves time because you just to buy one time and store the food in it. So the next time our stomach needs some food, we will not need to go to the supermarket. We will just open our refrigerator.
RAM functions like that in a computer system, in audio recording, chunks of digital audio data are being routed from hard disk to CPU, instead of quering hard disk all the time. RAM stores the data temporarily, for faster data transfer. So in a computer audio recording, big RAM is much needed. For a typical Pentium 4 system, I recommend a RAM of at least 1GB.
6. The quality and response of your studio monitors - this is very important because studio monitors are gateway to your ears, it is your messenger. In a real life scenario, supposing you are in a battle and you have messenger that is giving you false information. You will surely not win in a battle. The same analogy with recording, if you are mixing a very important song. But you have a studio monitor that cannot reproduce bass sounds (do not have sub-woofer), then you are in a big trouble. I highly recommend, whatever type of studio monitor you use, make sure:

a. It has wide and flat frequency response (around 20Hz to 20,000 Hz)
b. It is a stereo sound system (2.1 is recommended for audio mixing, more than that is just confusing)
c. Has subwoofer dedicated to sub bass.
d. Medium to high power amplifier, can be played loud without distortion or cracking.
7. The noise coming from the connections- there is no perfect recording system, all of it has noise. Noise is unwanted in recording because it will surely destroy your wanted signal. Noise can be further classified as "hum" (low frequency noise, such as 60Hz hum from power lines) or "hiss" (high frequency noise). Although all system has noise, in computer audio recording it is highly suggested to keep it at minimum. It is because, most home recordings do not have the most expensive recording systems that controls noise. The best way to control noise is controlling the connections. Connections are form of wires/transformers that are interconnected with each other. For maximum power transfer condition, these connectors must be matched. And it is highly suggested to use shorter wires as signals will get lost as the wire gets longer. Buy a decent and clean connector free from rust. Rust can contribute heat resistance which converts to noise in audio.
8. The quality of DAW (Digital Audio Workstation) , this is important. Quality DAW can offer a wide recording features to maximize recording quality. Examples are noise reduction features, effects and plug-ins. Cheap DAW, especially the freeware cannot help to improve your recording and mixing. There are many high quality DAW, like Adobe Audition (the one I am using for more than 4 years), Pro tools from Digidesign (industry standard), Cubase (also a good one) , Soundforge/Sony Vega (available with video editing features if you need). Those are the ones I recommend if you want to select a DAW. I highly suggest that you will not shift DAW always. It is good to master one to maximize recording quality. I believe quality recordings is a function of ones ability to handle his DAW. This means that a Cubase expert can produce great recordings than an amateur Protools user. Mastery of your selected digital audio software is the highly important in computer audio recording.
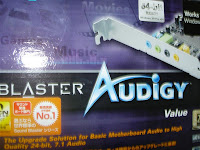
9. The quality of your motherboard - I used the top of the class motherboard at the time (2004) I built my computer. It was Asus P4P800-X. It was far expensive than any class during that time. But I say, it was worth it. P4P800-X has the best onboard soundcard I have tried and helps me to record up to 7 of my best songs! Without even relying on high-end soundcard. Now that I switch to Creative Audigy Value, I even missed the onboard soundcard. But I know I could even produce a better recording with my new gear investment. Powerful motherboards offer so many RAM slots, PCI slots, faster connections (I mean busses). It is analogous to having your components in a very very wide highway. We can drive very fast in a very wide highway without traffic. It is the same with expensive motherboards.
10. The quality of your headphone - although not very important but it you will use this to check the audio during a recording process or review the mix in a headphone. Although it is not recommended to mix using headphones but having a quality headphones makes a difference in quality recording.
11. The optimization of your operating system- this is very critical as the operating system of your computer controls the recording process. If it is not optimized, it will increase the latency of your recording and drop outs in your audio. In my system , I have used Windows XP Service pack 2, and for years it served me well.
I do tweaks on my windows xp computer and here are some few tips to optimize it:a. Use DMA mode not PIO mode. To check go to control panel, system- hardware-device manager-IDE/ATA controllers-Primary IDE channel-Advanced settings-Current transfer mode.
Current transfer mode should be DMA.
b. Defrag computer once a month. Defragmentation process, will make the fragmented files closer to each other in a hard disk space, thus faster to be accessed.
b. Optimize for background services, Audio drivers runs in the background. And to do this, Control panel-Device manager-system-advanced-performance-advance-processor scheduling -background services.
c. Optimize for best performance- To do this , go to control panel-device manager-system-advance-settings-visual effects-adjust for best performance. In this type of optimization. Windows XP will not display the flashy colors, animations thus helping to save it for audio usage.
d. Optimize the virtual memory- set it to system managed.
e. Clean files regularly to optimize hard disk space.
12. The acoustics of your room - of course it matters, although we cannot afford a world class acoustics. But in my experience, I learn the acoustics in my room by closely studying the frequency response of it. I do it by listening to a professional mixed CD in my room, hear the bass levels, treble levels, mid frequencies. How is it responding to your ear is important. Then go to your mix and matched to that level. By knowing the acoustics of your room, it will help you create a good mix. The most important is that, give some time to know the acoustics of your room by listening to a professionally mixed CD and compare it to your mix.
13. The quality of your CD-drive - many would say, this is not so important. Yes it is. But take note that during a mastering process , wherein a mastered track will be burned down to CD audio, this will use the CD drive. If your CD drive is not optimized for audio, then you will have problems. The best quality CD drive for mastering/computer audio recording applications requires a very slow burning speed of around 1x to 4x. It is because the slower your burning speed, the higher accurate it is. The faster the burning speed, the more prone to errors. It is why master CD to be submitted for replication needs to be burned at a slow rate to prevent digital errors during CD replication.
NOTICE: TO LEAVE A COMMENT, PLEASE VISIT THE NEW URL OF THIS PAGE: http://www.audiorecording.me/13-important-factors-in-computer-audio-recording.html
